27.02.2026
100


Obviously, we live in a three-dimensional world and people naturally create 3D items for the entire history without a back thought. Good examples of creating 3D objects are pottery, building structures, carving items out of wood, etc.
With modern technology we have computer 3D modeling, VR, AR, 3D printers, so it’s a completely new approach to designing and creating objects in three-dimensional space. It’s a great new skill and we should learn it—better sooner than later. In this article you’ll learn about the 3D Builder app by Microsoft, how to use it to create and edit simple 3D models so that you can create and print things in less than 45 minutes.
Computer 3D modeling could be challenging, especially when it comes to creating photorealistic objects, characters, and environments. Thanks to apps like 3D Builder, you can start creating your own worlds and print out your ideas without learning all the theoretical basics that include lots of terms such as vertices, polygons, renderer engines, etc.
CyberFox develops 3D solutions for websites and it’s used in business. In the essence, it is much more than just creating 3D models, but this part is included too as an inseparable from any AR or 3D solution online. For example, if you want to develop a 3D configurator for a specific car model, you need to design seats, panels, exterior and interior to let users customize options for their liking.
One of the benefits is that you don’t have to learn how to code 3D solutions for the web and how to model, or hire specialists from these two categories. CyberFox combines everything for you into a single solution and literally, there’s just one agreement you need to sign, not multiple ones that include many contractors.
If you order a solution at CyberFox, you don’t need to learn 3D modeling. However, you can preview models that are created, look at them from all the angles with 3D Builder.

We give you a realistic assessment of the work completion time. You always get the job right on time.

Based on your project, we will suggest how to achieve the best result. Just send the materials you have.

Our experience and knowledge allow us to offer the best solutions to show your ideas. If you have questions, just ask.

We perfectly understand when you need visualizations urgently. We work fast.

We share our expert opinion on how best to present your project because we care.

You do not need to understand the software or 3D imaging technology. Everything is available at CyberFox.
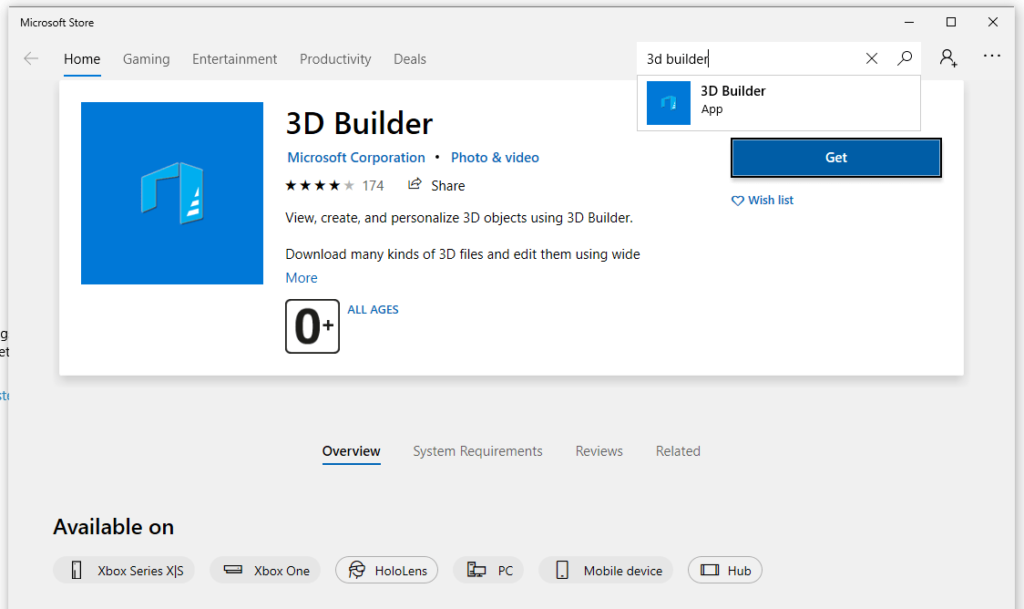
3D Builder is an app developed by Microsoft. In this app you can insert, edit, paint, combine and modify 3D objects for printing. You can build 3D objects and have them delivered to your door.
As for editing, you can import 3D items made in this or another 3D editor or add them from the built-in library. The following formats are supported for import: .stl, .obj, .3mf, .wrl, .ply, .gltf, .glb. You can create new models from the primitives, such as cubes, cones, etc. edit and colorize surfaces, change materials, and many more.
Because it’s a Microsoft program, you need to have a device that runs Windows OS, such as a PC, Microsoft Surface or another tablet, and it even works on Xbox.
There are detailed system requirements on the software and devices you can use:
| OS: | Windows 8.1, 10, Xbox |
| CPU architecture: | x86, x 64m, ARM, ARM64 |
Recommended 3D printers are da Vinci, there are STL and other types of printers. Alternatively, you can use an online printing service and have the printed details delivered to your door.
The installation takes a couple of minutes, and the only complication may occur if you don’t remember your Windows account’s login and password.
This is quite a simple app with a limited set of functions and it works best for these purposes:
There are plenty of ready-to-print models that just need a little touch, fix, and optimization before sending it to a 3D printer. 3D Builder is very good at it, and it has a built-in 3D Library with hundreds of free items that you can search and insert right away into your scene.
You can easily preview a model that you purchased online or that someone created for you. For example, if you go with CyberFox services, it includes creating 3D models for your online solution, such as an online gym customizer. You can preview workout equipment items that CyberFox creates in a program like 3D Builder.
This is a technique that concept artists use to sketch out an object they are going to create from simple elements or even primitives, such as cubes and spheres. This is a very efficient approach to start creating something complex, such as a space station. A quickly kitbashed model immediately gives a 3D perception of what it’s going to be. On the other hand, drawing sketches on paper takes much longer and it lacks a 3D feel.
You can create items from scratch or add items from the 3D Library. Either way, you have the freedom to customize the objects, group and ungroup elements, change dimensions, simplify or make the surface smoother.
To avoid any confusion, let’s point out what this app is NOT for. It’s not for interior design, creating plans and complex items. In other words, it’s not a very advanced editing tool.
In this app you can’t freely design complex and precise details for mechanisms, scientific experiments, and pieces for robotic appliances. There are more professional CAD-tools like Rhino and Autodesk Fusion 360. Learn more about these apps in the Alternatives paragraph below.
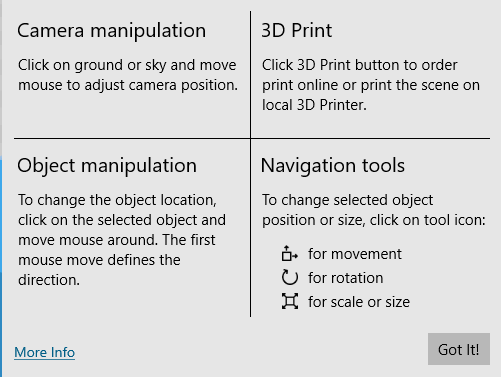
On the very first launch you’ll be greeted with a quick overview of and how to do basic actions, such as selecting objects and navigating in a 3D scene.
By clicking on the hamburger menu button on the upper left, you’ll see a sidebar with a familiar Windows menu where you can Open and Save files, send objects to 3D Print.
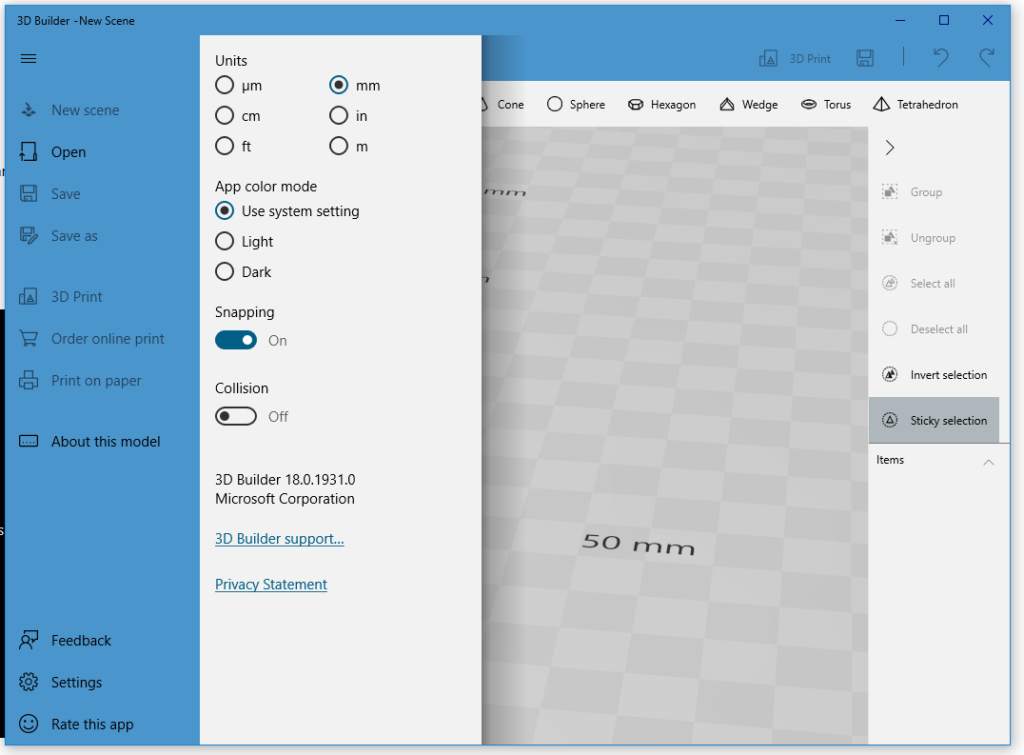
Also, you can configure Settings by clicking on it down below. There, you can change the Units to metric or imperial. From the UI standpoint, you can select Light or Dark scheme, and that’s pretty much all the UI customization. Collision detection is a very handy feature that prevents overlapping by different objects.
Note: most 3D modeling apps don’t have Collision detect feature on by default and some apps (like Blender) don’t even have this feature at all.
Two essential options in all 3D modeling applications are selecting objects, orbiting, panning, and zooming. It’s most convenient to navigate in 3D apps with a typical Microsoft mouse that has two buttons and a scroll wheel.
Hold the left mouse button and drag so the camera will orbit around the selected item.
Hold the right mouse button and drag so you’ll be panning the camera to the side from the selected object.
Use mouse scroll to zoom in or out to the objection selection. If it’s not centered, use Pan to zoom into the detail you want to see.
By clicking on them with the left mouse button. It’s recommended to turn on the extended right pane so you can see the list of the objects on your scene and see which ones are selected at the moment.
Check out the selection and grouping tools on the right pane. There’s a list of items where you can see which objects are selected at the moment. Use the Deselect all button to reset selection quickly.

If you are the kind of person who needs to know every button before creating anything in the new environment, let’s see what each tab and panel does in this builder tutorial. Good news is that this app doesn’t have many excess features and we can overview the menu thoroughly without writing a separate article.
The first tab on the toolbar is the Insert tab and it’s the place where you would Add models from the built-in 3D objects library or insert primitives into your scene.

Add model from the library
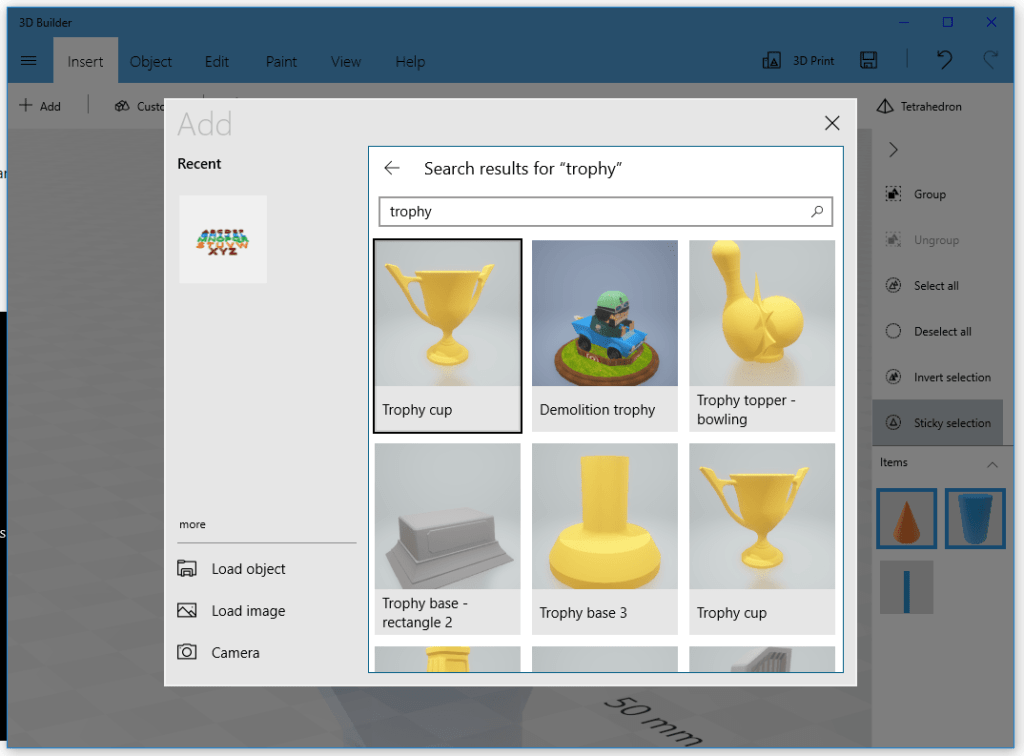
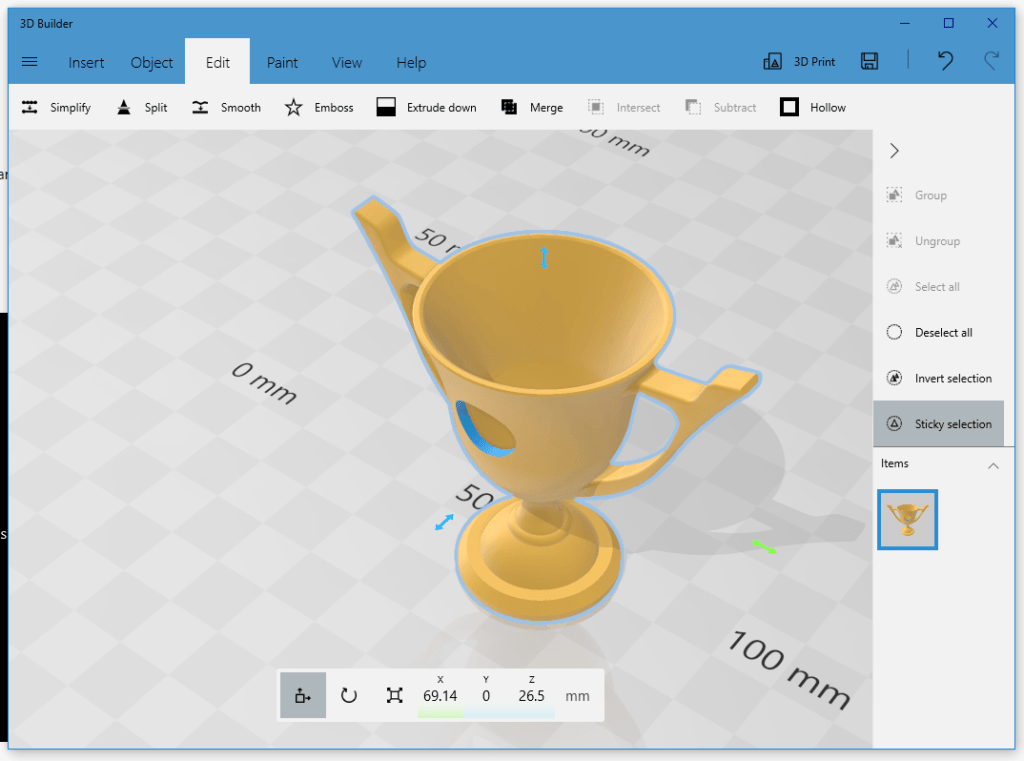
By clicking on Add which is the leftmost option on the Insert tab, you’ll see a dialog window where you can see the categories of the items in the library and do a quick search. Here, I tried looking for a Trophy cup which will be a great item to print.
Add primitives
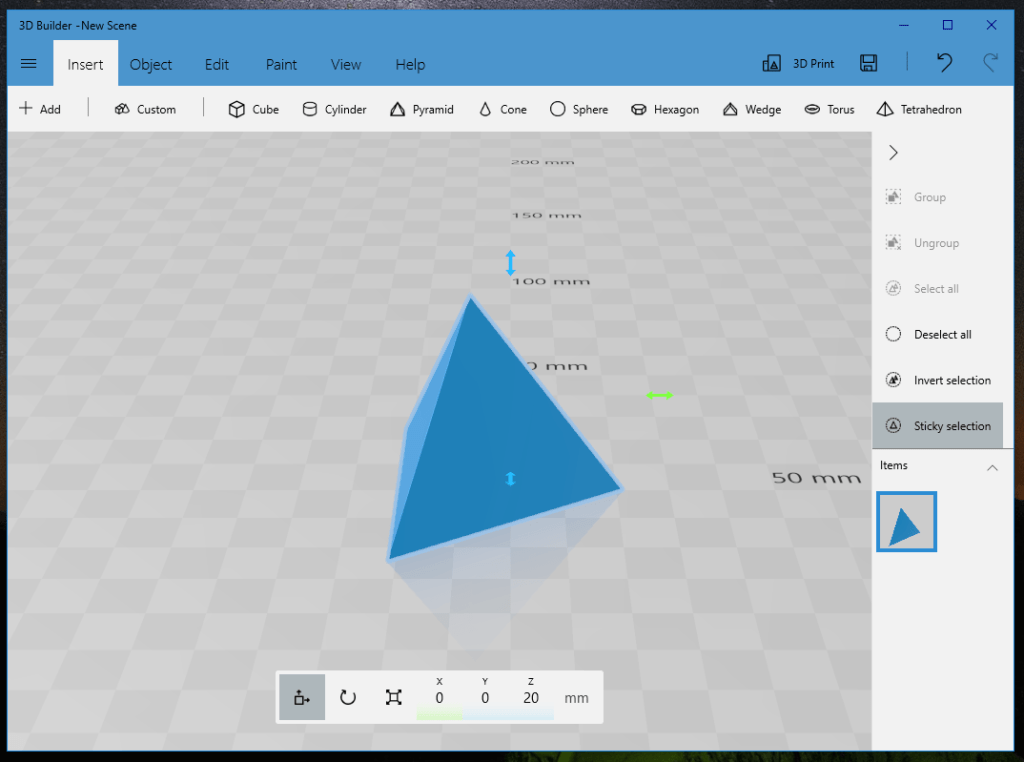
Among the primitives you’ll find these: Cube, Cylinder, Pyramid, Cone, Sphere, Hexagon, Wedge (like a house roof), Torus, and Tetrahedron (triangular pyramid).
Once you added an item, you’ll see the floating panel down below (heads-up display) that has these essential object manipulation tools:
Each mode will show slightly different arrows, also called gizmos. The green one is the active and if you click on it and drag, the object will move by the X axis to the right.
Next to this set of tools, you’ll see numeric values for position, rotation and scale (each mode will show you different values. For example, when we created a Tetrahedron, it’s global position shown by the Move tool is as follows: X = 0, Y = 0, and Z = 20 mm. It’s a center of this primitive and it’s 20 mm up.
If we switch to the Scale tool, you’ll now see that it is 40 mm tall. And X and Y have decimal values. If we click on each value, we can override it by typing a number on a keyboard. Also, we can lock the dimensions of the item so when we change one, others change accordingly and don’t transform the item.
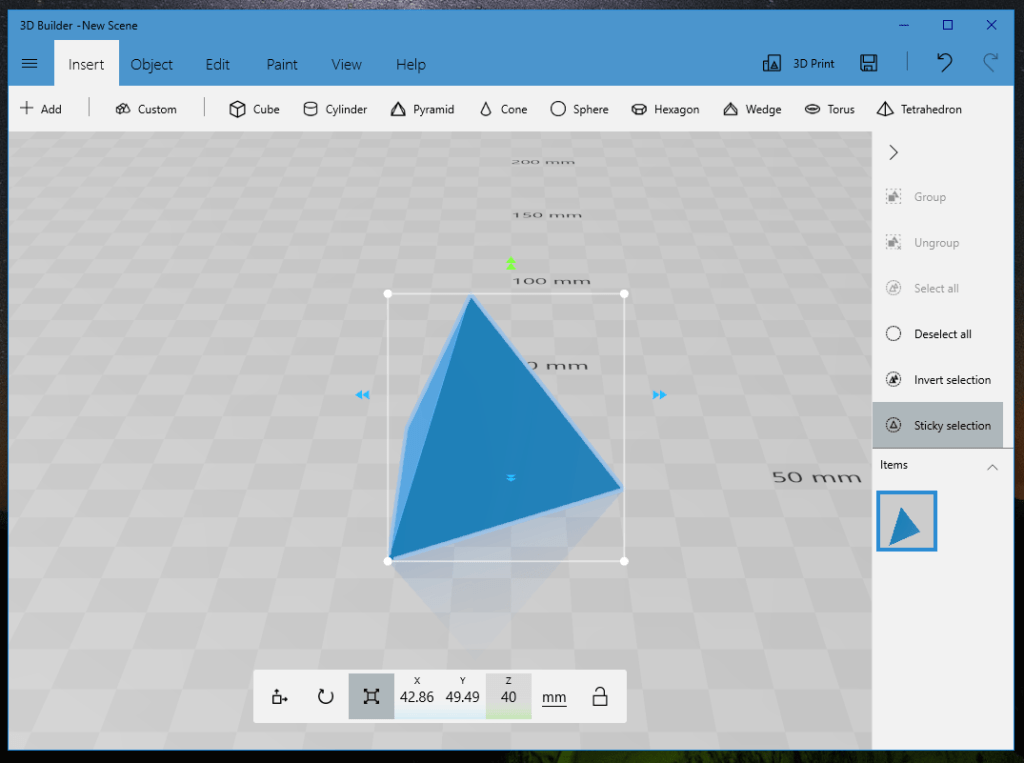
Hint: on the X Y Z numeric panel you’ll see a subtle colored underline, and you can tell which axis is active by the green color.
There is no a typical right mouse button menu in this app, therefore, cut, copy and paste operations are resided in this tab.
Here is a list of shortcuts you’ll use every day:
Ctrl + Shift + C to Duplicate, Ctrl + C to Copy, Ctrl + V to Paste, and Del to Delete.

Also, you can Settle the object to reset its rotation and make sure that it has a solid base for the best printing experience.
Use Mirror to reflect the object in the currently selected axis.
Measure is a tool to check the distance within your scheme. When this option is engaged, click one time to set the point A, then click on the point B, and it’ll display a distance for you.
In the Edit tab, you’ll find all the tools used for fixing and altering the surface of the 3D models. All these tools have a self-describing names:
Simplify, Split, Smooth, Emboss, Extrude down and Boolean operations:
Merge selected objects into a single surface, Intersect, and Subtract.

Boolean operations example
Let’s see how the Subtract operation works.
Create and place a cylinder to overlap the surface of a larger form. Select the cylinder and click Subtract. It created a round hole in a larger object and there’s no cylinder on the Item list anymore.
Hollow option
To reduce plastic consumption when printing a model, you can easily make thick objects hollow from the inside with this option. Nonte that you won’t see any difference without an X-ray view.
In the Paint tab, we can add color and texture to our scene. It can be useful for colored 3D printing, which is quite rare, so most commonly it’s used to make a pleasant looking scene.

View tab offers you such options as X-ray, shaders, reflections, and structural details in the viewport of the application. It doesn’t affect the model itself, but it helps you see, for example, how a large number of polygons (triangles) are arranged on the 3D model.

The 3D print option can be activated by clicking on the button next to the tabs, or simply by pressing Ctrl + P on your keyboard. Of course, a compatible 3D printer (e.g., da Vinci 1.0 Pro by XYZprinting) should be set up for it to work.
The right-hand sidebar shows you important select options and the list of items. You can see what objects are currently selected. It can be minimized, but when you are learning a tool, it’s a good idea to unfold it to see the captions.
The program is very simple to start working with to use and it has been created for general users. Now that you know what each menu item does, you can experiment, navigate, create a scene or make a 3D object you want.
Microsoft UI/UX designers did a great job on usability of this application. It’s built around a well known tab interface, like in Microsoft Office so it feels like home at the very first launch.
3D Builder use cases include numerous home printing that was science fiction a couple of decades ago, and now it’s available to anyone for free.
Some of the Reddit users (credit to BlueLightning888) created and posted these amazing examples of 3D artwork created in 3D Builder:
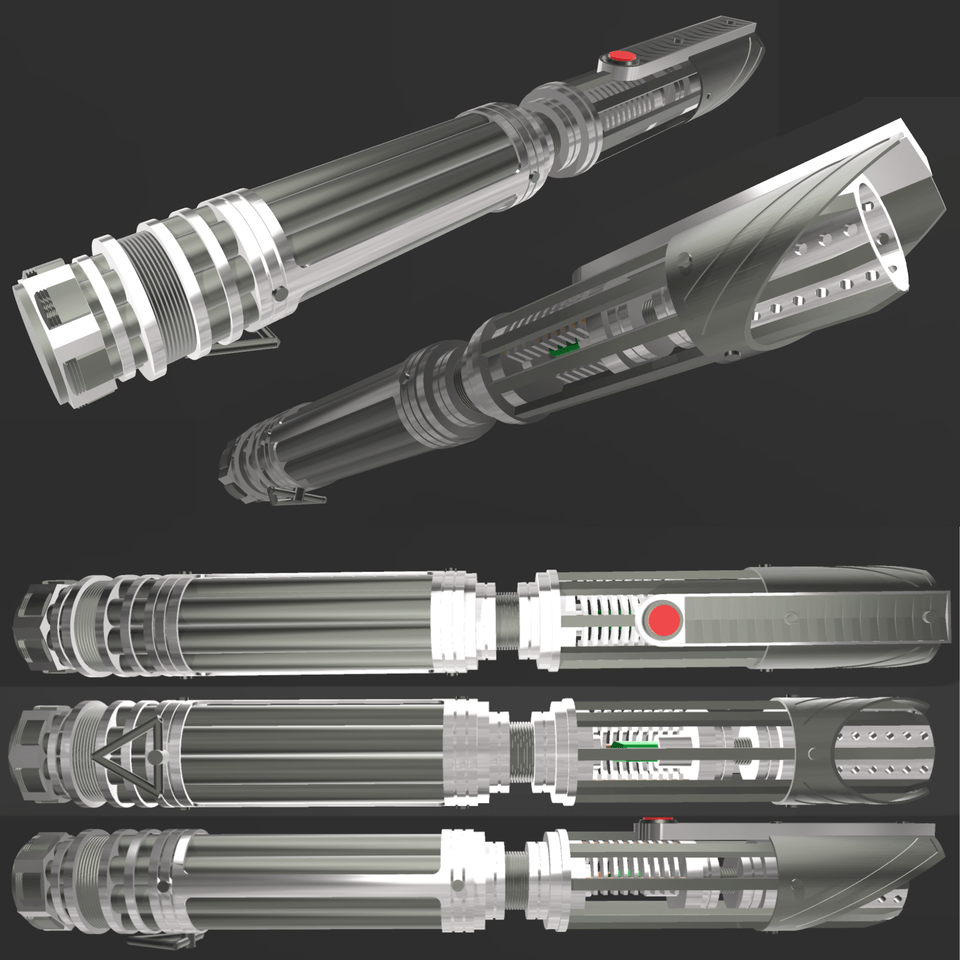
There is more to explore in 3D creation apps and 3D Builder in particular. As you can see from these results, this relatively simple app can do great things in the right hands.
The community of this app is one of the aspects why you should try it out in the first place.
Most questions are answered on the official Microsoft community, just ask by searching “3D Builder” at answers.microsoft.com website.
There are lots of amazing 3D communities for hobbyists and enthusiasts who enjoy 3D printing and creating 3D models. Sure, you should check out these:
As for the technical support, the product is free so don’t expect phone and email support staff that’ll answer your questions. If you got stuck or ran into a problem, don’t hesitate to ask at Microsoft help forums.
Simple programs to start that I would definitely recommend are 3D Builder if you want to check out 3D printing quick and easy and Sketchup.
This tool is the next simple tool to learn by everybody. SketchUp has a very simple creation process with patented extrude tools that let you draw out blueprints with pencil and extrude them into walls and cut out windows in no time. It’s used by hobbyists, homeowners,
Fusion 360 is a CAD-tool by Autotesk and it’s free for personal use. It is best at precise and iterative design of details that you can print and improve by adjusting your 3D model before the next print. For example, you can print mechanical parts for robotic arms, missing gears and other items that can fix, create, or improve something.
Blender is an all-round tool for computer-graphics. You can create virtually ANY model, create assets to videogames, VR scenes, etc. Some studios made even a few 3D animated cartoons made completely with just this application. It’s hard to create precise details though and therefore we can say that it’s not 3D-printer friendly.
3D Builder is a great place to start your journey into 3D modeling, 3D printing or just developing a new skill, that’ll be very important in the upcoming years.
Other 3D applications might be very tempting to learn, but they’re thousand times more complex and require weeks, and months to create decent results and years to master.
CyberFox is an expert in developing 3D solutions, including modeling 3D items and scenes that you or your end users can interact with. It saves lots of money for e-Commerce where you need just one model of an item and not take photos from all possible angles, post-process them and upload to your server storage.
3D experiences are great from 360º by default and 3D models, like vector graphics, take up much less space, and traffic, therefore, they load faster and let you save on the infrastructure.