27.02.2026
96

It is hard to imagine modern life without computer graphics and 3D objects. 3D modeling has radically transformed the usual methods of prototyping and manufacturing things.
For example, earlier a specialist manually turned out products on a machine based on a drawing, but now it can be done automatically with equipment based on a 3D model. This simplifies the process and improves the quality of the product. This article will tell you how to create a 3D model of yourself.

3D graphics are used in various fields, including architecture, interior design and computer games. Many areas of activity are difficult to imagine without volumetric visualization.
It is difficult to make a 3D model yourself, and it takes a long time. You will have to master professional software, and even after training, you may end up with a low-quality 3D model.
In addition, such programs work well only on powerful computers. Therefore, many people entrust the work of creating 3D models to companies.
CyberFox makes 3D models based on drawings, sketches, and photographs. We help implement any project, from modeling parts for production to making a souvenir product model. Use the callback order service, and we will tell you the deadline for completing the order and the cost of 3D modeling.

We give you a realistic assessment of the work completion time. You always get the job right on time.

Based on your project, we will suggest how to achieve the best result. Just send the materials you have.

Our experience and knowledge allow us to offer the best solutions to show your ideas. If you have questions, just ask.

We perfectly understand when you need visualizations urgently. We work fast.

We share our expert opinion on how best to present your project because we care.

You do not need to understand the software or 3D imaging technology. Everything is available at CyberFox.
Read on to get a brief overview of various 3D modeling software.
The unique capabilities of 3D scanning are increasingly being used in various fields. For example, you can find 3D scanning in industrial production, architecture, medicine, and film. You can also do 3D scanning on your phone.
Today, many manufacturers provide convenient and practical tools. For example, a built-in device for obtaining a three-dimensional model is already available in the new iPhones, the Samsung Galaxy line, and in the latest Lenovo gadgets. However, the quality of the resulting digital blank differs slightly from a professional one. Apple products have a built-in scanner that allows objects to be projected through a series of point measurements, even at night.
If there is no built-in 3D scanner on the smartphone, you can install it yourself. However, most modern products have the necessary equipment, so you just need to install the software.
3D technologies are constantly evolving. Many tools and solutions improve the quality of the final product. Models are becoming more detailed and realistic, and simplicity and speed increase user convenience. 3D scanner apps for smartphone are no exception, so let’s learn how to make a model with a full-featured scanner app using a smartphone. Let’s consider the possible 3D scanning methods:
There are a large number of mobile applications for 3D scanning. In most cases, they are used by novice designers. You have to install a 3D scanning program on your phone.
If the process is essential to you and not the result, you can use mobile applications for 3D scanning. However, it is impossible to achieve accurate results. To do this, you will have to buy professional equipment.
Scanners are used to create 3D models of objects. 3D scanning equipment allows you to create an exact copy of any part, considering the features of shape, structure, shading and other parameters.
Scanners can be contact or contactless. Contact devices interact directly with the analyzed object and create a virtual copy. A unique, highly sensitive probe allows you to achieve high-quality detail.
Contactless models obtain an image by acting on an object using light waves or ultrasound. The waves bounce off the object and build a model based on this data.
Such scanners are suitable for prototyping large parts, as well as for animation development. Devices with a passive principle of exposure to rays use ambient light to build a prototype. Such scanners reflect only the visible parts of the original piece.
Kinect is an accessory for the Xbox 360 console, with a video camera and two sensors located at the top of the device. Many Xbox Kinect owners use this to scan 3D models.
Preparation for scanning is quite simple. First, you need to purchase a Kinect controller and a set of accessories for connection, and download Kinect for Windows packages and the Skanect program.
Scanning a shape can be done in two ways. First, it is necessary to rotate the object, or move the Kinect around it. During this process, you needs to move smoothly, maintain a distance, and move the camera up and down..
An essential requirement is to keep the object completely immobile throughout the scanning process. Even the slightest movement will create unnecessary protrusions of the shape and artifacts that will require time-consuming post-processing of the model.
Scanning booths are characterized by high performance and scanning accuracy. The result can be saved in OBJ, VRML, PLY, STL and AVT formats.
The device is a rotating frame with sensors mounted on a circular platform. A closed shell exists only for the convenience of customers. In this form, it is convenient to transport and easy to assemble. Using a scanning booth is the most advanced type of 3D scanning.
There are various mobile applications for 3D scanning.
Bellus3D has established itself as one of the best face recognition systems and algorithm developers. The brand’s offerings include the Bellus3D Face Camera Pro, which is compatible with Windows and Android.
Bellus3D also offers the Bellus3D FaceApp application for iOS owners. With its help, users can get high-quality 3D models of their faces using the iPhone X. FaceApp allows you to create a full-fledged 3D selfie. The creation process takes about 10 seconds, during which you will need to turn your head slowly. The procedure resembles the initial Face ID setup on iPhone X.
The finished 3D model consists of more than 250,000 points combined into an array, according to the developers.

Scandy Pro, using a smartphone camera, allows you to get a 3D model of almost anything, such as your head, a slipper, a vase or a pot.
The image is rendered on the device, and the result will be available in .ply files.
Since the models are processed locally, the application does not provide a cloud storage function.

Scann3D is a free and unique application with which you can turn images from your device into three-dimensional 3D models of excellent quality. The process is simple: just load the selected object into the project interface. Then wait for the process to complete.
The result will be displayed on the screen and available for saving and then sending by email or posting on social networks. In addition, there is a set of editing tools. You can use it simultaneously with other applications to make 3D reconstructions on mobile devices without knowledge or experience.

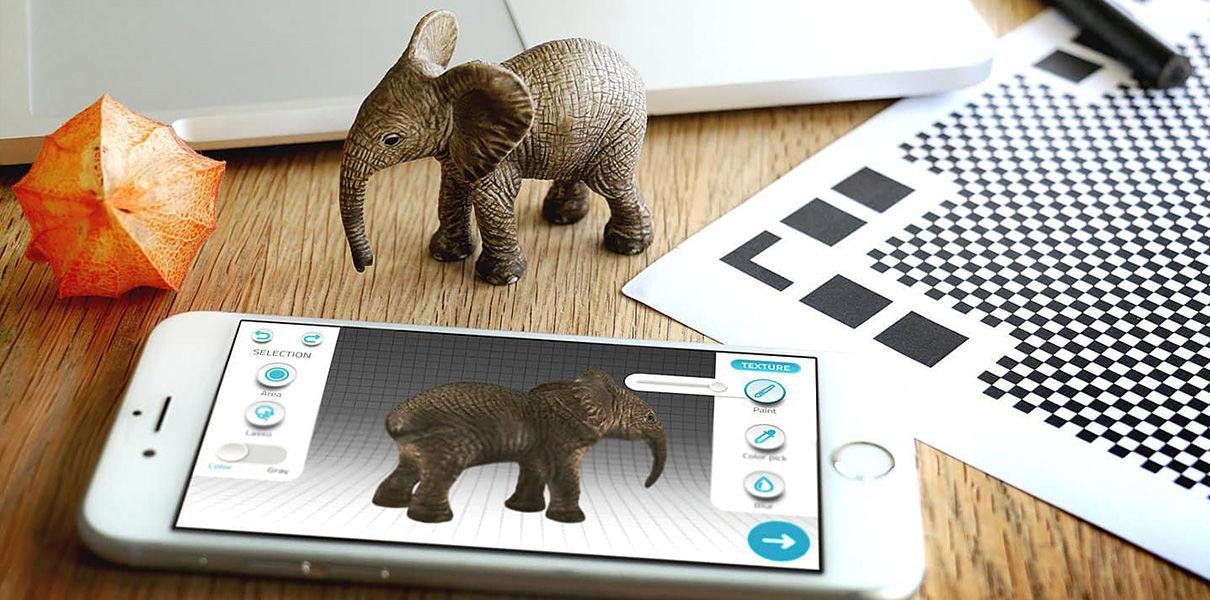
EyeCue Vision Technologies’ Qlone is another program that lets you do 3D scanning.. Before starting, you will need to print a special Qlone sheet. Scanning is effortless: just press the plus button and then move your phone or object until the AR dome becomes transparent.
After the software displays the model, you can color and export it. Another feature of Qlone is that you can scan from more than one position, and the app will combine them for a better result.
Let’s analyze what steps need to be performed to obtain a 3D model successfully.
Each device has specific instructions for this procedure, so be sure to consult the manual; however, there are several standard elements. Before starting, it is necessary to turn on the 3D printer and heat the extruder.
Then, feed filament directly into the mechanism in accordance with the design of the device. Finally, insert the filament firmly so that melted maerial appears in the extruder. As soon as this happens, the procedure is over. The clamping mechanism is ready. If there is a feed tube, it must be installed in place.
For offline 3D printing without a computer, prepare the code in advance in Gcode format for 3D printing and save it to an external SD card.
Turn on the printer and insert the SD card on the left side near the display into the appropriate slot. At the same time, a message will appear at the bottom of the the card is inserted.
If there are no heating instructions in the code, it is necessary to turn on the heating of the platform and nozzle and adjust it to the desired object temperature from the printer display menu. After the printer heats up, select “Print from SD card” from the menu.
Try to move the 3D printed object. Gently grab it and separate it from the platform.
If this does not help, try using a little more strength. You can pull out the print platform and tap the object from the sides if you have a rubber hammer. Aim for solid surfaces. Otherwise, you can damage the object by hitting a weak spot.
After the substrate has been removed or dissolved, the model can be sanded to smooth out roughness and irregularities and remove unnecessary parts, such as support structures.
The initial grit size of the sandpaper depends on the layer thickness and print quality. For a layer thickness of 200 microns and below, grinding can begin with a grain size of 150. If there are obvious defects or the object was printed at a layer height of 300 microns or higher, you can use a grain size of 100 microns for grinding.