03.06.2021
1836

In this article, we’ll be discussing the most advanced features of developing 3D configurator models.
The process of developing 3D models for web configurators has many distinctive traits, which are set out by the requirements of the configurator itself, such as optimization and functionality.
For the final result to meet exact expectations, it is important to provide your customers with high-quality and easy-to-understand components. These product components are the basis for the development of a high-quality 3D model.
Types of components that are important in the development of 3D models:
It is especially important to note that the more initial data given on the project, will result in the project being finalised quickly and with greater detail. Therefore, providing the developer with detailed information, will speed up the overall project time, and reduce costs for your customers.
For developing 3D models being used on the web, optimization is a critical feature. This allows 3D models to be used across multiple devices without sacrificing product model quality.
If a 3D scene contains models consisting of a dense (non-optimized) polygonal mesh, high-resolution textures, then there is a high probability that this scene may not open on a large number of low-performance devices or iOS devices that have significant restrictions for web applications. All restrictions can be divided into 2 types:
Hardware restrictions. These include: missing free disk space, low-performance video card, poor Internet connection, lack of support for modern shaders by a video card.
Software restrictions. These restrictions are specific to the operating system and software on different browsers. These include limitations on support for texture formats, support for video files/codecs, errors due to missing fonts or incorrect encoding.
By knowing the features of the model, software, and technical limitations, it is possible to identify the main directions for optimizing the model:
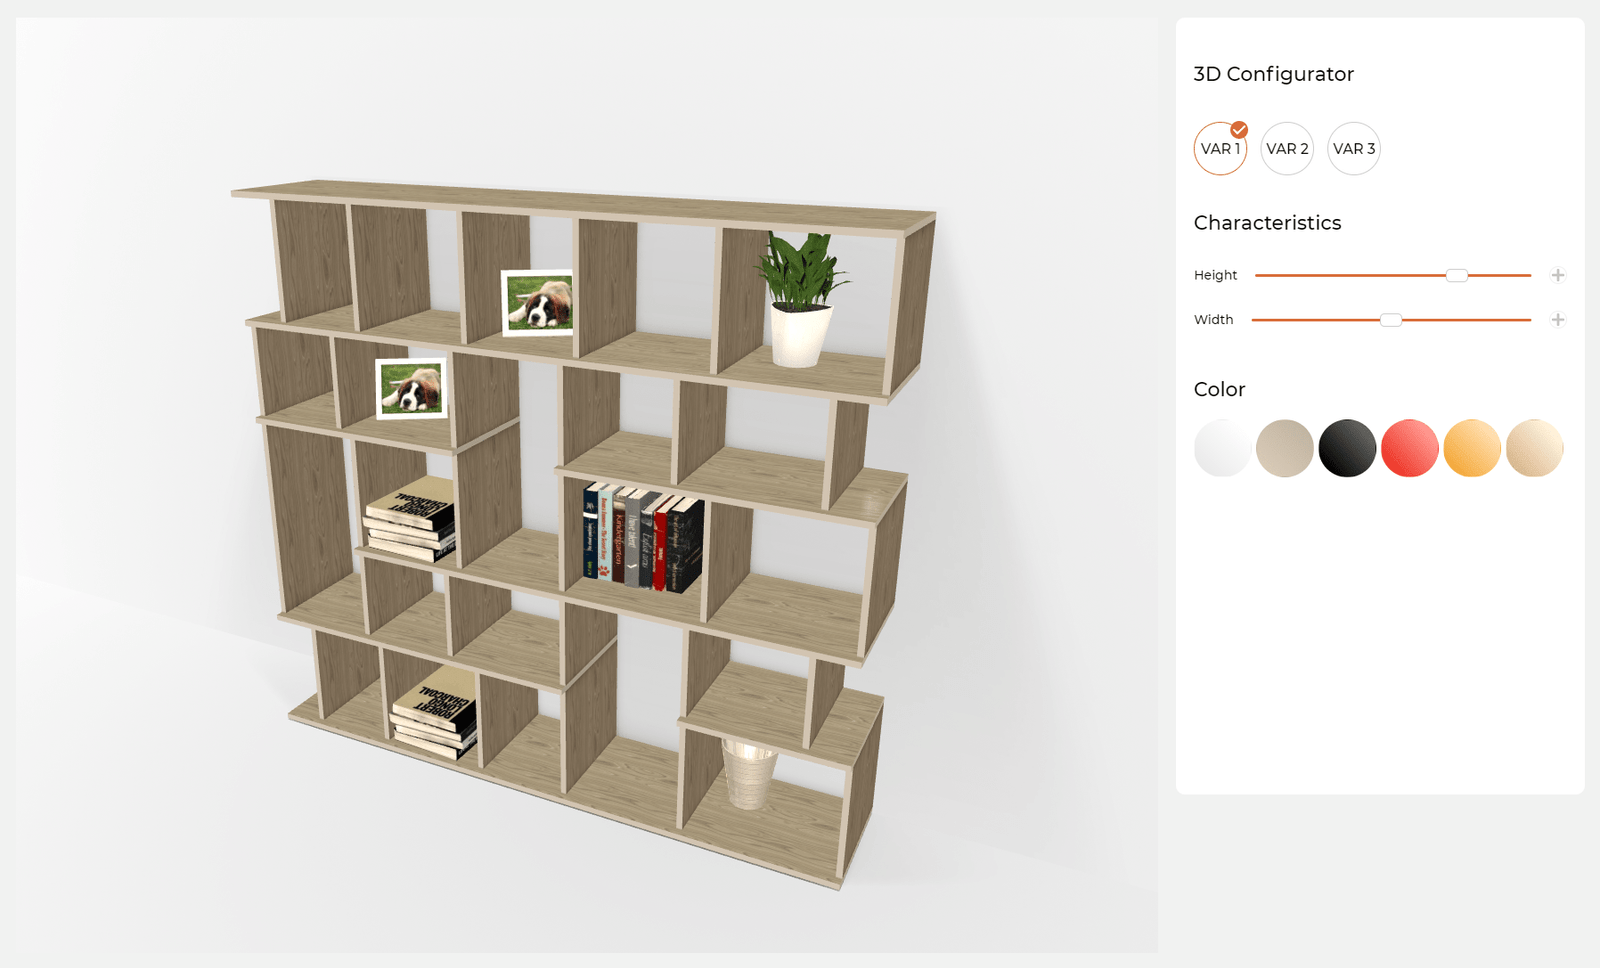
A 3D model has no restrictions in setting colors and textures for object surfaces. Simply, to change colors, the color code is added to the palette, and by clicking on the specific interface button, the product color changes. In some cases, you can take a solid color image and then replace it with different patterned images. This is a highly sought-after feature for projects, for example, your customer may want to view a table, they are able to replace a solid red colour with the texture of wood to bring it to life.
And, since it is possible to change different textures, the parameters for the material will also change. The product surface needs to be considered as well. This changes from a lacquered solid-colored countertop to a grainy pine wood, which has a significantly different texture.
What is the difference? Firstly, it is the depth of the different materials. Also known as the relief. Pinewood does not directly reflect like a mirror, as there is a lack of shine due to no aluminium powder. Aluminium powder is the most commonly found in car bodies, and the effect is noticeable throughout the material settings. Setting up these different relief effects allows your customers to adjust the material to the desired texture. This is especially important for brickwork, where customers can replace the brick with cinder block or stone.
Animated textures also allow your customers to add reflective sunbeams and reflections underwater, or represent the movement of waves on the water, by simply changing the color of the water and the height of the relief effect of the water surface.
Additional geometry features in a 3D configurator are shown in the interactive model displays, that can be hidden or replaced with similar ones. Using a shoe configuration as an example, there is the possibility of changing the sole or type of laces. In this case, all variations of the shoe sole and laces will become the additional elements.

Due to the abundance of customisable elements for projects, there is an emphasis on working with the correct grid and product materials. By implementing these elements it produces the quickest result for your customers.
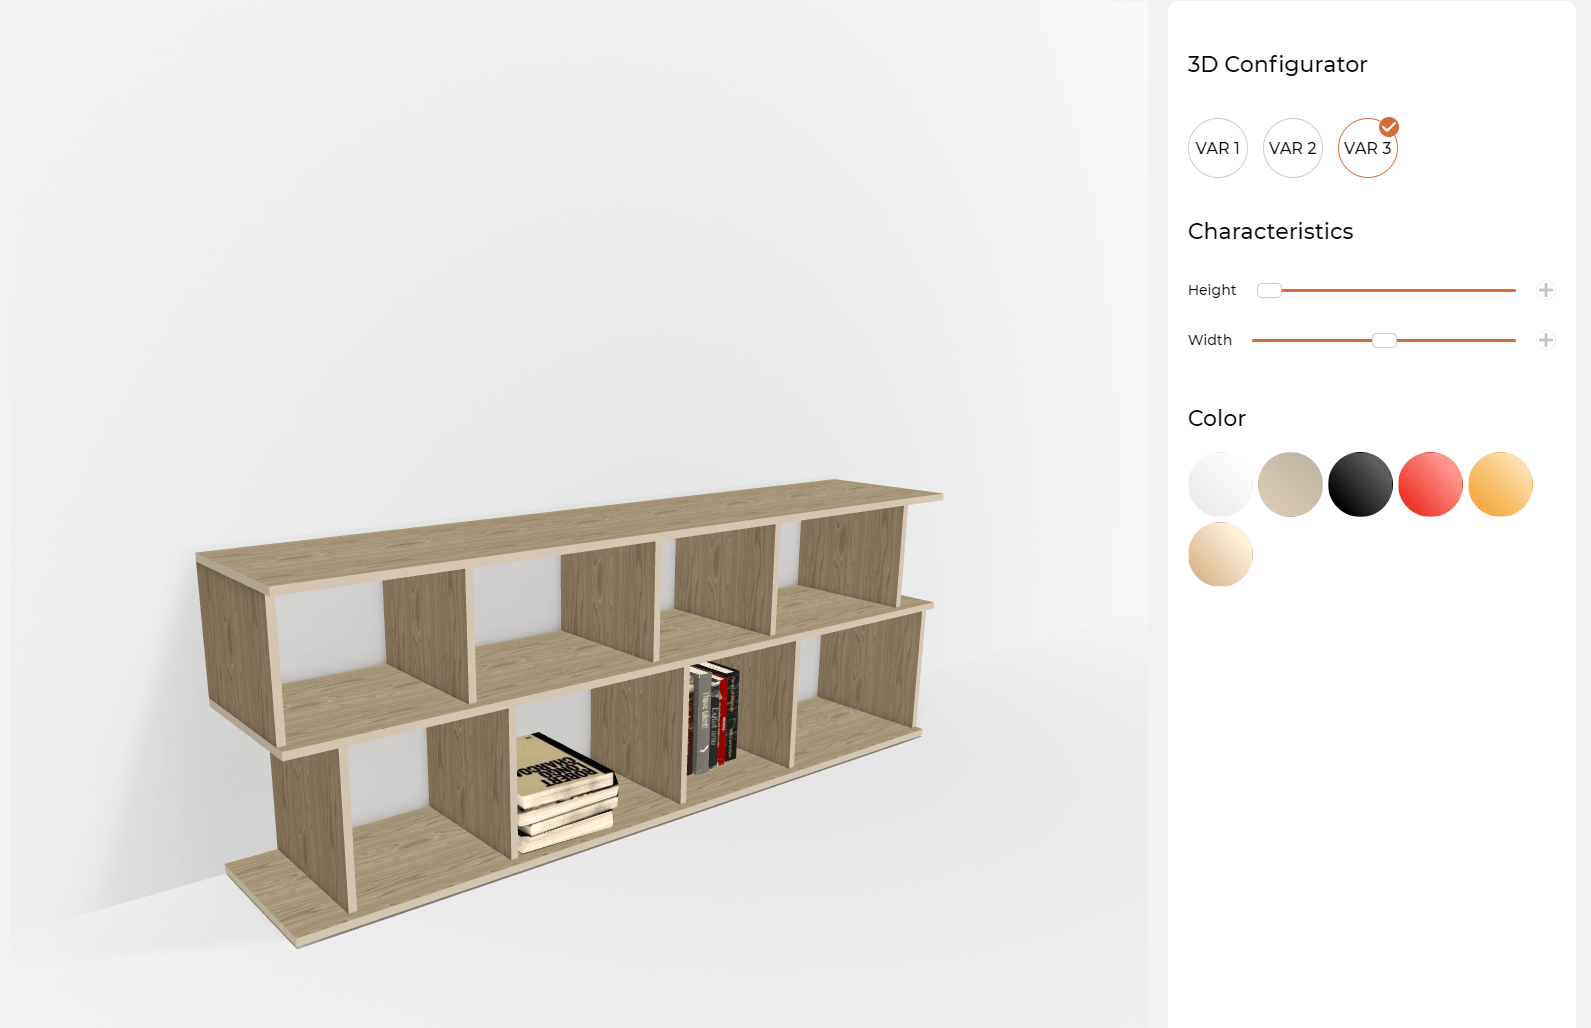
Displaying different materials is a fantastic feature of a 3D configurator, but there is another feature that distinguishes our services from others on the market: this is the ability to change the size of different products.
Parametric models are unique in the fact that they can display the size of the product in accordance with the real life-size. Need to increase the width of your cabinet? Pull the Width slider and get the size you want. Want to know the cost of a tall vase? Pull the “Height” slider and find out the price. By changing the size of the geometry, you can calculate the cost using a real-time calculator.
This feature simplifies your eCommerce processes by significantly reducing the time between management approvals, manual cost calculations and other specific client changes. Your customers can do this directly from the interactive displays.
Texture baking is one of the key factors in model optimization. After this stage is complete, the model layout will be far more detailed, the appearance of light and shadows will help bring the product to life. Due to the laborious work of the baking process and resource intensity, it is important to note that no further changes to the geometry of the product would need to be made. By making sure that no more changes are needed for final optimisation, will help ensure that the development stages do not need to be repeated, as changes to the model after this process can be resource-intensive.
An example of this;
A customer may want a tile model shown on a wall, these tiles are being developed as rectangular. A tile object contains at least two sweeps, one for light and one for tiling. Any resizing of the model will require manual adjustments to these two flat patterns. Therefore, even after changing one wall, the customer would have to re-bake the light for the entire room. Changing the volume also changes the light factors, the light begins to spread differently, casting unwanted shadows. And, the model would need to be re-baked for all objects. By making sure that each step along the optimization process is understood and carefully tracked will avoid customers having to begin again.
Due to its complexity, the process of developing 3D models for configurators should be structured as much as possible, described in detail, and supplemented with high-quality reference materials. If you follow all the development rules and thoroughly prepare for it, then initial processes won’t take long, and the result will increase your business efficiencies and your customers can customize products exactly to their liking.
Still, have questions? Leave a request in the feedback form, and we will be happy to discuss a model development plan for your configurator.